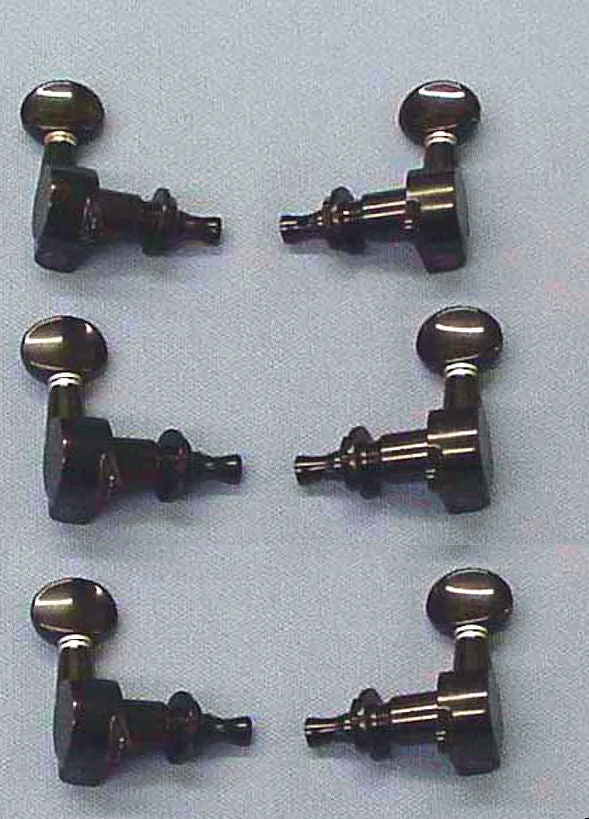
What are Diecast Tuning Pegs
Diecast tuning pegs are a crucial component of any guitar, responsible for holding the strings at the headstock and allowing you to adjust their tension, thus changing the pitch. Unlike cheaper tuning pegs, diecast tuning pegs are typically made from a robust metal alloy using a die-casting process, resulting in a high-quality, durable, and precise mechanism. This manufacturing method ensures a high level of accuracy and consistency, which is essential for maintaining tuning stability and overall performance of the instrument. The superior construction of diecast tuning pegs translates to smoother operation, greater resistance to wear and tear, and ultimately, a more enjoyable playing experience. Investing in diecast tuning pegs can significantly improve the sound, playability, and longevity of your guitar, making them a worthwhile upgrade for both beginners and experienced players alike. They are commonly found on a wide range of guitars, from entry-level instruments to high-end professional models, showcasing their versatility and widespread acceptance within the guitar community.
Advantages of Upgrading
Upgrading to diecast tuning pegs from stock or lower-quality pegs offers a multitude of benefits that directly impact your guitar’s performance and your playing experience. These upgrades are not just about aesthetics; they are about enhancing the fundamental qualities of your instrument. The advantages extend far beyond simple visual improvements, touching on aspects of tuning stability, sound quality, and the overall feel of the guitar. By investing in higher-quality components like diecast tuning pegs, you are investing in a more reliable and enjoyable instrument. The difference can be immediately noticeable, and it’s one of the most impactful upgrades a guitarist can make to their instrument. The tangible improvements make it a cost-effective way to enhance the functionality and enjoyment of playing the guitar.
Improved Tuning Stability

One of the primary advantages of diecast tuning pegs is their superior tuning stability. The precise engineering and robust construction of these pegs minimize slippage and ensure that your guitar stays in tune for longer periods. This is crucial for any guitarist, as constant retuning can be frustrating and disrupt the flow of playing. Diecast tuning pegs resist the effects of temperature and humidity changes, which can often cause strings to go out of tune. This stability allows you to focus on playing without constantly worrying about your instrument’s intonation. Whether you’re performing on stage, recording in a studio, or practicing at home, the reliability of diecast tuning pegs ensures your guitar sounds its best, session after session. This improved stability is directly attributable to the precision of the internal gears and the overall quality of the materials used, setting them apart from lower-quality alternatives.
Enhanced Resonance and Sustain
Diecast tuning pegs contribute to the overall resonance and sustain of your guitar. By efficiently transferring string vibrations to the headstock, these pegs allow the instrument’s body to resonate more fully. This results in a richer, fuller tone with improved sustain, allowing notes to ring out longer. The increased mass and density of diecast pegs can also contribute to this effect, as they help to absorb and transmit vibrations more effectively. This can be especially noticeable in the lower frequencies, where the enhanced resonance can add depth and complexity to the sound. Players often describe this as a more ‘alive’ or ‘vibrant’ sound, making the guitar more responsive and expressive. The impact on sustain is particularly beneficial for soloing or creating ambient soundscapes, where the ability of notes to ring out clearly is paramount.
Increased Durability and Lifespan
Diecast tuning pegs are designed for durability, offering a longer lifespan compared to cheaper alternatives. The materials used in their construction, such as high-quality metal alloys, are resistant to wear, tear, and corrosion. This robust build means that the pegs are less likely to strip, break, or suffer from the common issues that plague lower-quality tuning machines. The precision engineering of the internal gears further contributes to their longevity, as they are designed to withstand the stresses of frequent tuning and string changes. This durability not only saves you money on replacements but also ensures that your guitar maintains its tuning stability and tonal quality over time. With proper care and maintenance, diecast tuning pegs can last for many years, making them a reliable and worthwhile investment for any guitarist.
Choosing the Right Diecast Tuning Pegs

Selecting the right diecast tuning pegs involves considering several factors to ensure they are compatible with your guitar and meet your specific needs. The market offers various options, each with its own set of features and benefits. Understanding these factors will enable you to make an informed decision and choose the best tuning pegs for your instrument. Careful consideration of these elements will help you find pegs that not only improve the functionality of your guitar but also enhance its overall playability and aesthetic appeal. From the type of guitar to the gear ratio, taking the time to evaluate each aspect will guarantee a seamless integration and optimized performance.
Consider the Guitar Type
The first step in choosing diecast tuning pegs is to consider the type of guitar you have. Different guitars, such as acoustic, electric, or classical, have specific headstock designs that require compatible tuning pegs. Acoustic guitars often use slotted headstocks, which require pegs with a specific post length and string post configuration. Electric guitars, on the other hand, may use inline or 3+3 headstock configurations, which dictates the style of tuning pegs required. Classical guitars have distinctive slotted headstocks and typically use tuning pegs designed for nylon strings. Ensure the pegs you select match your guitar’s headstock design. Also, consider the size and shape of the peg holes in your headstock, as some pegs require larger or different-sized holes. Researching the specific model and make of your guitar will help you find tuning pegs that fit perfectly, avoiding the need for modifications.
Assess the Gear Ratio
The gear ratio of tuning pegs is a crucial factor in determining the precision of tuning. The gear ratio refers to the number of turns required on the tuning key to move the string post a single revolution. A higher gear ratio (e.g., 18:1 or 21:1) provides more precise tuning, allowing for finer adjustments and reducing the likelihood of overshooting the desired pitch. This is particularly beneficial for players who require accurate tuning, such as those who use alternate tunings or perform intricate fingerstyle techniques. Lower gear ratios offer faster tuning but at the expense of precision. Consider your playing style and tuning preferences when selecting the gear ratio. Players who prioritize speed may prefer a lower ratio, while those who value accuracy should opt for a higher one. Experimenting with different gear ratios can help you find the perfect balance between tuning speed and precision for your guitar.
Check the Mounting Hardware

Before purchasing diecast tuning pegs, carefully check the mounting hardware requirements. Different pegs use various mounting systems, including screws, bushings, and washers. Ensure the new pegs are compatible with your guitar’s headstock and that the mounting hardware is included in the package. Pay attention to the size and thread of the screws, and the diameter of the bushings. If you are replacing pegs, compare the new hardware with the old to ensure a proper fit. If the new pegs require different-sized holes, you may need to ream the headstock. This process requires specialized tools and may be best handled by a professional luthier. Also, verify that all components, such as washers and nuts, are included and of the correct size. The correct mounting hardware is essential for a secure and stable installation, ensuring that the pegs function correctly and maintain tuning stability.
Step-by-Step Installation Guide
Installing diecast tuning pegs is a straightforward process that can be accomplished with basic tools and a bit of patience. While the specific steps may vary slightly depending on the guitar model and the type of pegs, the general process remains consistent. Following these steps will ensure a smooth and successful installation, allowing you to quickly upgrade your guitar. Prioritize accuracy and take your time, and the results will be worth the effort. Before you start, gather all necessary tools, including a screwdriver, pliers, a peg winder (optional), and the new tuning pegs. Ensure you have a clean workspace and clear all obstructions to avoid any accidents.
Removing Old Tuning Pegs
Begin by removing the old tuning pegs from your guitar. Use a screwdriver to remove the screws that secure each peg to the headstock. Once the screws are removed, gently pull the pegs out of the headstock. In some cases, the pegs may be held in place by bushings or washers; remove these as well. Be careful not to damage the headstock during this process. If the old pegs are difficult to remove, try using pliers to gently grip the peg shaft while carefully wiggling it out. If your guitar has bushings, you may need a specialized tool to remove them. Ensure you keep all the removed hardware, as it may be useful during the installation of the new pegs. After the old pegs are removed, inspect the headstock for any damage or wear and tear. Clean the area around the peg holes to prepare it for the new installation.
Installing New Diecast Tuning Pegs

With the old pegs removed, you can now install the new diecast tuning pegs. Insert the new pegs into the corresponding holes on the headstock. Ensure the pegs are correctly oriented, with the string post facing the correct direction. If your new pegs use screws, align the screw holes and carefully screw them into the headstock. Be careful not to overtighten the screws, as this could damage the headstock. If your new pegs utilize bushings, insert the bushings into the headstock holes before inserting the pegs. Make sure the bushings are seated firmly. Once all the pegs are in place and secured with their respective hardware, double-check their alignment. Ensure the pegs are flush against the headstock and that the string posts are straight. If any adjustments are needed, make them now before stringing the guitar.
Stringing and Tuning Your Guitar
After installing the new tuning pegs, it’s time to restring and tune your guitar. Begin by threading the strings through the holes in the string posts. Pull each string through the post and then wrap the string around the post, starting from the inside and going outward. This helps to secure the string and prevent slippage. Once the strings are wrapped around the posts, pull them taut and begin tuning the guitar. Use a tuner to bring each string to the correct pitch. As the strings stretch, they will go out of tune; retune as needed. Repeat this process until the strings are stable and remain in tune. Give the strings a gentle stretch by pulling up on them near the soundhole to help them settle and reduce the initial stretching period. Once the strings are tuned and stable, you can trim the excess string length with wire cutters. Regularly check and adjust the tuning as needed.
Maintenance and Care
Proper maintenance and care are crucial for extending the lifespan and ensuring the optimal performance of your diecast tuning pegs. Regular care can prevent premature wear, maintain tuning stability, and keep your guitar sounding its best. Simple practices like cleaning and lubrication, coupled with regular inspections, can make a significant difference in the longevity and functionality of your tuning pegs. By incorporating these maintenance tasks into your guitar care routine, you will enjoy a consistently well-tuned and responsive instrument. Proper maintenance ensures that your investment in diecast tuning pegs pays off by providing years of reliable service and excellent performance.
Cleaning and Lubrication

Cleaning and lubricating your diecast tuning pegs are essential maintenance tasks. Over time, dirt, dust, and grime can accumulate, causing friction and affecting the smooth operation of the pegs. To clean the pegs, use a soft, dry cloth to wipe away any visible dirt. Avoid using harsh chemicals or solvents, as these can damage the finish. For lubrication, apply a small amount of a specialized lubricant designed for musical instruments. This will reduce friction, prevent rust, and ensure the gears move smoothly. Apply the lubricant sparingly to the gears and other moving parts of the pegs. After applying the lubricant, turn the tuning pegs several times to distribute it evenly. Cleaning and lubricating should be done periodically, especially if you notice any stiffness or resistance when tuning your guitar.
Regular Inspection
Regularly inspect your diecast tuning pegs for signs of wear, damage, or loosening. Check the screws to ensure they are securely fastened and tighten them if necessary. Look for any cracks, bends, or other visible damage on the tuning pegs. Inspect the string posts for any signs of wear or deformation. Also, check the gear mechanism for any excessive play or unusual noises. If you notice any issues, address them promptly. Tighten loose screws, lubricate the gears, or replace any damaged components as needed. Early detection and repair of any problems can prevent more serious issues. By making regular inspection a part of your guitar care routine, you can identify and address potential problems before they impact the performance of your instrument.
Troubleshooting Common Issues
Even with the best care, you may encounter some common issues with your diecast tuning pegs. Understanding these issues and how to address them can save you time and frustration. Here are some common problems and their potential solutions. If you encounter issues, the following troubleshooting tips can help you diagnose and resolve them quickly. If you’re not comfortable performing these repairs, consult a qualified guitar technician to prevent further damage to your instrument. Early intervention can often prevent small issues from escalating into larger problems, ensuring the continued functionality and performance of your guitar.
Slipping Tuning Pegs Often, slipping tuning pegs are due to worn gears or loose screws. Tighten the screws holding the tuning pegs in place. If the slippage persists, the gears may be worn and need replacement. Another cause is the string not being properly wrapped around the post; ensure strings are wound correctly. If the string is slipping at the post, try using a string-lock peg design or making sure the string is properly anchored. Consider replacing the tuning pegs if the issue is persistent. Difficulty Tuning If you have difficulty tuning your guitar, start by checking the string tension. If the string is stuck, gently lubricate the post. Ensure the strings are seated correctly in the nut slots, as this can also affect tuning stability. If you’re using new strings, they may need time to stretch, so retune frequently until they stabilize. If the problem persists, examine the tuning pegs for damage or internal issues. Stiff Turning If the tuning pegs are stiff, try lubricating them with a specialized instrument lubricant. If this does not work, the pegs may be worn or damaged and may need to be replaced. Ensure no debris or corrosion is obstructing the gears. If the turning is still difficult, consider consulting a professional to diagnose the issue. Unusual Noises Grinding or squeaking sounds when tuning the guitar may indicate worn gears or lack of lubrication. Lubricate the pegs to reduce friction. If the noise persists, inspect the gears for damage. In some cases, replacing the tuning pegs is necessary to eliminate the noise. By addressing these common issues, you can restore your guitar’s tuning stability and playability.